> ## Documentation Index
> Fetch the complete documentation index at: https://docs.kasoftware.com/llms.txt
> Use this file to discover all available pages before exploring further.
# Email Send 端口(已弃用)
> Email Send 端口通过 SMTP 邮件服务器发送消息,支持 OAuth 2.0 和基于模板的动态内容。
export const NameDescription = ({extraRows}) =>
| 设置 |
描述 |
| 端口 Id |
端口的静态、唯一标识符。 |
| 端口类型 |
显示端口类型及其用途的描述。 |
| 端口描述 |
一个可选字段,用于提供端口及其在流中的角色的自由格式描述。 |
{extraRows}
;
export const CommonProxySettings = () => <>
这是一组用于识别连接所经代理并对其进行身份验证的设置。默认情况下,本节使用 安全设置 页面的 代理设置 部分中的全局设置。清除此复选框可为您的端口提供特定的设置。
| 设置 | 描述 |
|---|
| 代理类型 |
基于代理的防火墙使用的协议。 |
| 代理主机 |
基于代理的防火墙的名称或 IP 地址。 |
| 代理端口 |
基于代理的防火墙的 TCP 端口。 |
| 代理用户 |
用于通过基于代理的防火墙进行身份验证的用户名。 |
| 代理密码 |
用于对基于代理的防火墙进行身份验证的密码。 |
| 身份验证方案 |
保留默认值 None 或选择以下身份验证方案之一:Basic、Digest、Proprietary 或 NTLM。 |
;
export const SlasTab = ({siteName = "知行之桥"}) => <>
与配置服务级别协议 (SLA) 相关的设置。
SLA 允许配置预期流程中端口发送或接收的数据量,并设置预期达到该数据量的时间范围。当 SLA 未达到时,{siteName} 会发送电子邮件警告用户,并将 SLA 标记为 存在风险,这意味着如果 SLA 未能尽快达到,则会被标记为 已违反。这让用户有机会介入并确定 SLA 未达到的原因,并采取适当的措施。如果在风险时间段结束时仍未达到 SLA,则会将 SLA 标记为已违反,并再次通知用户。
要定义 SLA,请启用 预期数据量,然后点击 设置 选项卡。
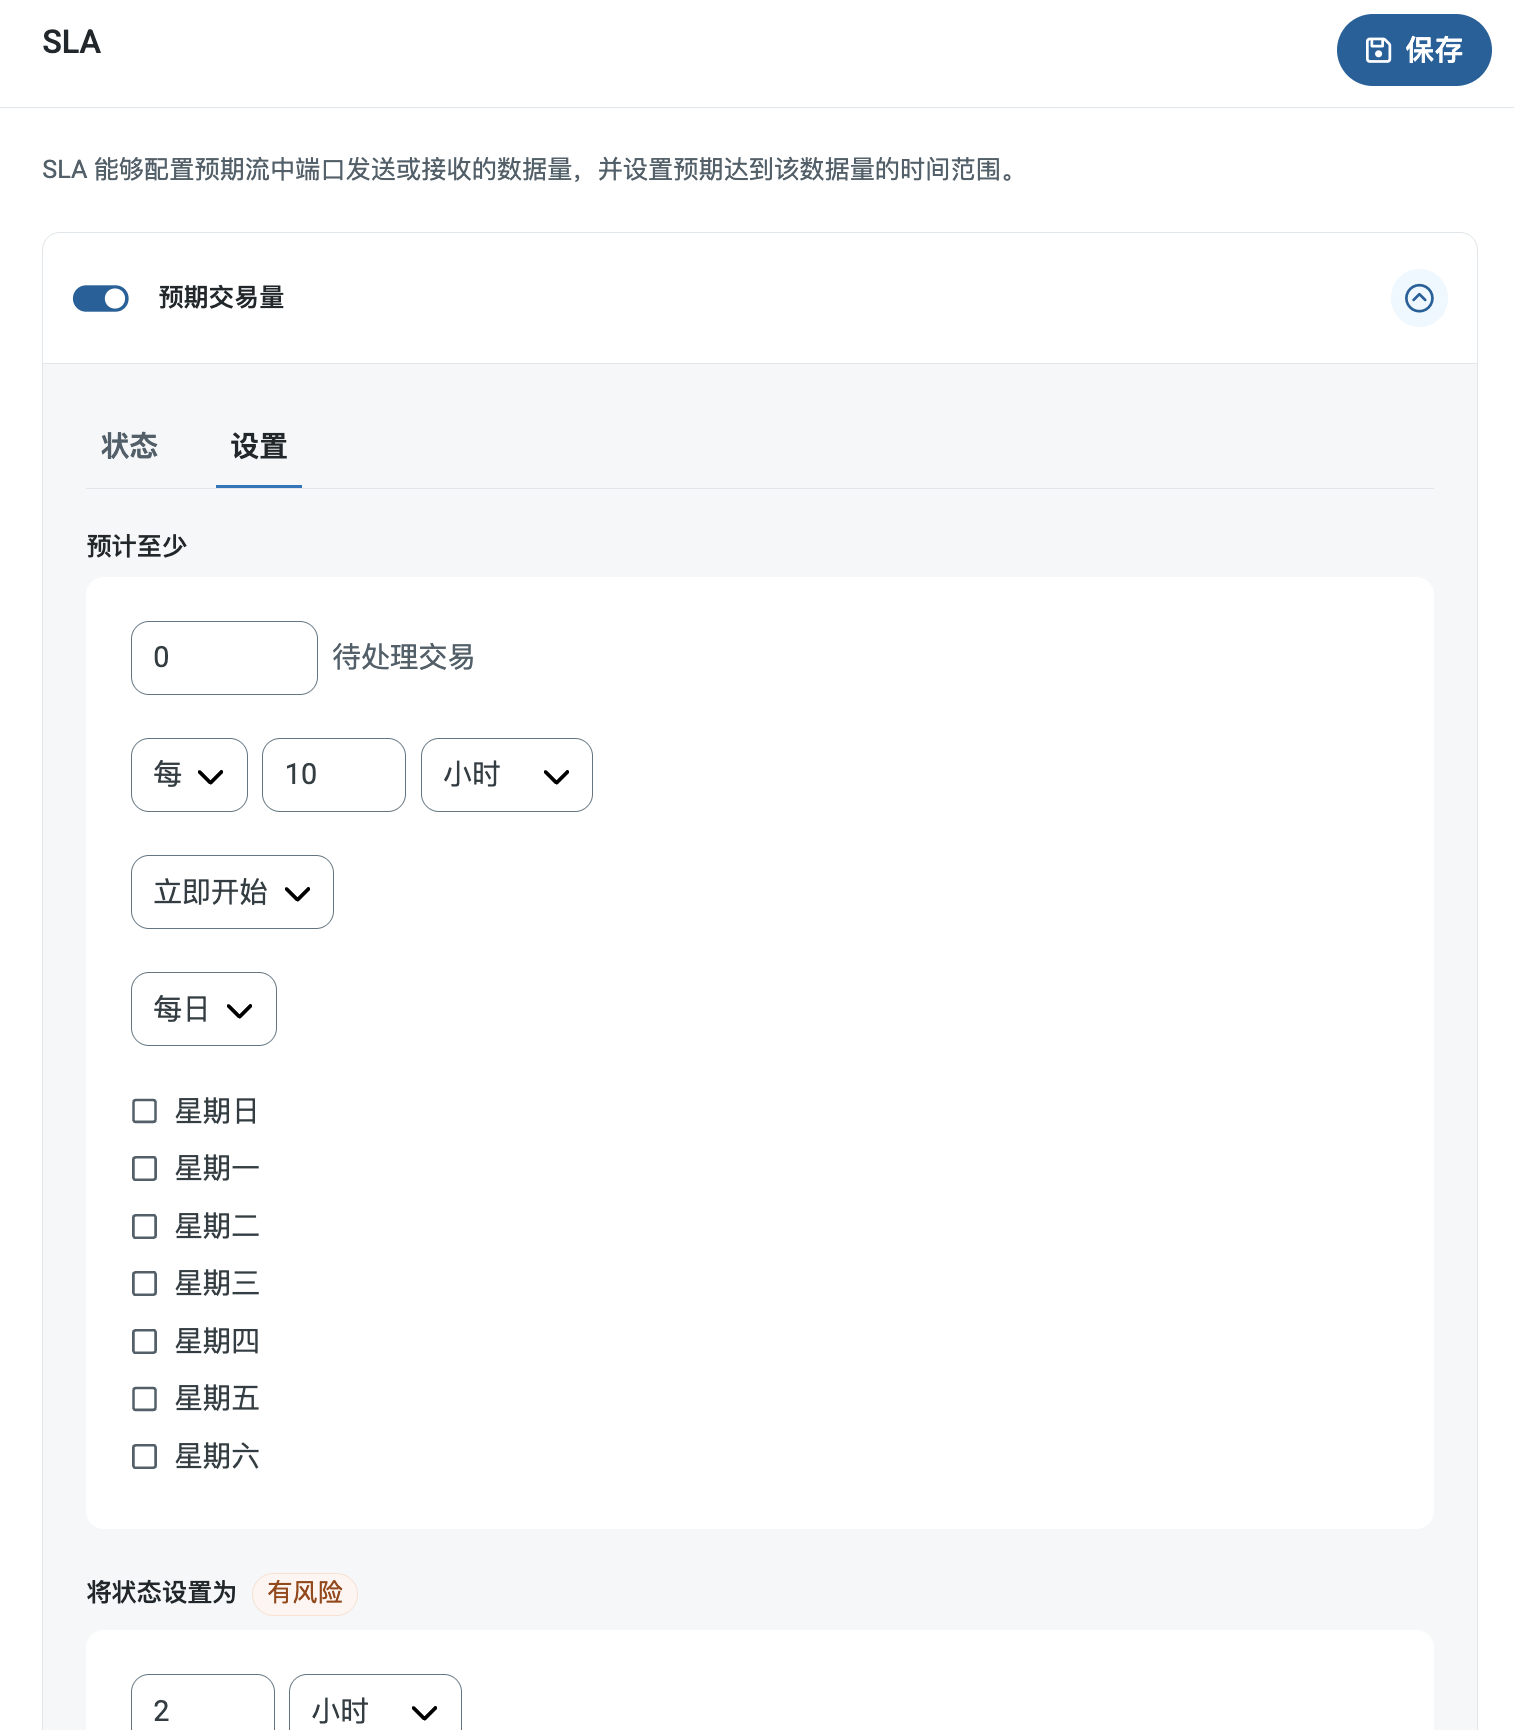
- 如果端口具有单独的发送和接收操作,请使用单选按钮指定 SLA 适用的方向。
- 在窗口的 预计至少 部分中:
- 设置预计处理的最小事务数量(交易量)
- 使用 每个 字段指定时间范围
- 指示 SLA 生效的时间。如果选择 开始于,请填写日期和时间字段。
- 勾选希望 SLA 生效的星期几对应的复选框。如有必要,请使用下拉菜单选择 每天。
- 在窗口的 将状态设置为“有风险” 部分中,指定应将 SLA 标记为有风险的时间。
- 默认情况下,只有在违反 SLA 的情况下才会发送通知。要更改此设置,请勾选 发送“有风险”通知。
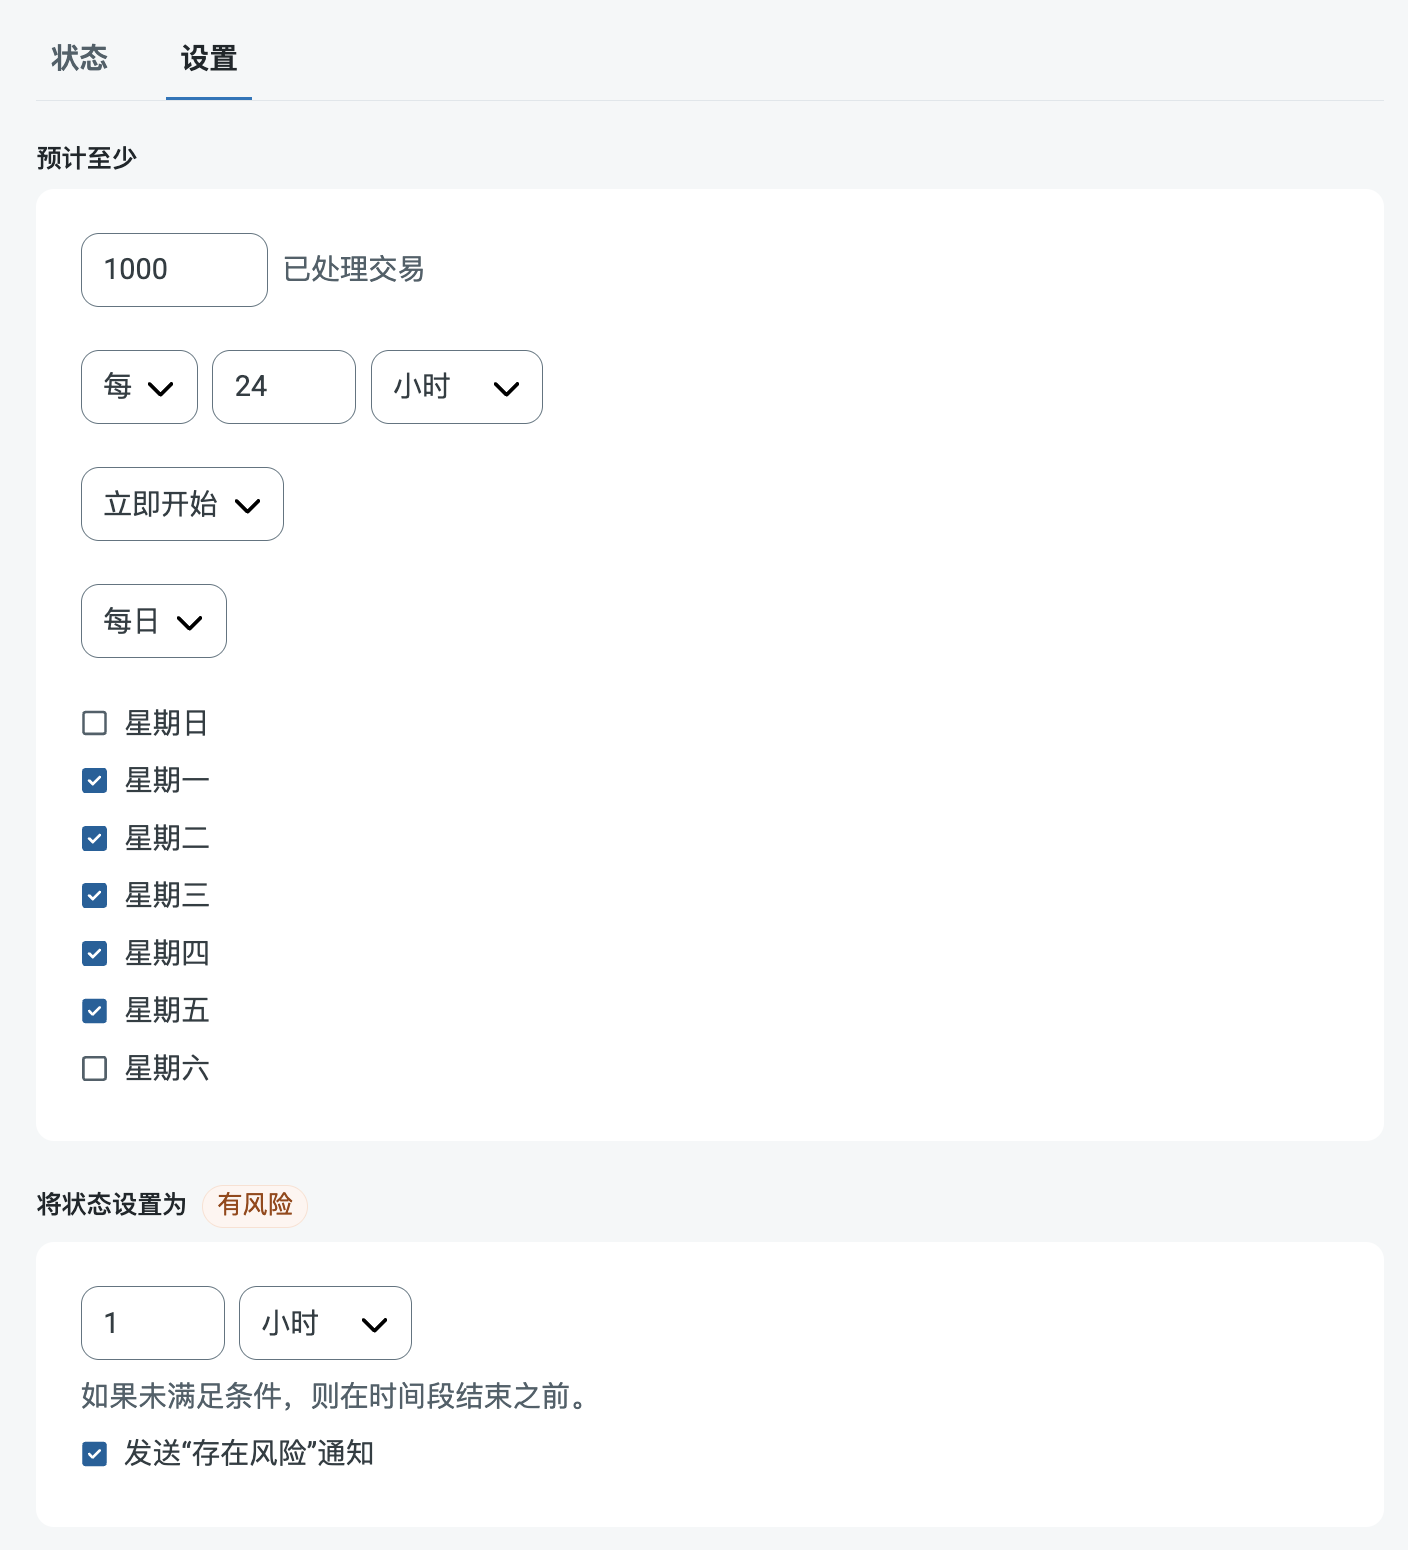
以下示例显示了为端口配置的 SLA,该端口预计在周一至周五每天接收 1000 个文件。如果尚未收到 1000 个文件,则会在时间段结束前 1 小时发送风险通知。
 如果有必要,可以关闭 SLA 通知。这在维护窗口期间非常有用。点击导航栏上的 设置,然后跳转到 通知 > 通用通知。点击平板和铅笔图标进行编辑,并取消勾选 SLA 通知 设置。
;
export const AlertsTab = ({siteNameShort = "知行之桥"}) => <>
如果有必要,可以关闭 SLA 通知。这在维护窗口期间非常有用。点击导航栏上的 设置,然后跳转到 通知 > 通用通知。点击平板和铅笔图标进行编辑,并取消勾选 SLA 通知 设置。
;
export const AlertsTab = ({siteNameShort = "知行之桥"}) => <>
与配置通知相关的设置。
在执行服务级别协议 (SLA) 之前,需要设置电子邮件通知以接收通知。默认情况下,{siteNameShort} 使用 通知 选项卡上的全局设置。要为此端口使用其他设置,请启用 覆盖全局设置。
默认情况下,错误通知处于启用状态,这意味着每当出现错误时都会发送电子邮件。要关闭错误通知,请取消选中 启用 复选框。
输入 主题(必填),然后(可选)输入以逗号分隔的 收件人 电子邮件列表。
;
export const Message = () => <>
消息设置确定端口如何搜索消息并在处理后管理它们。
| 设置 | 描述 |
|---|
| 保存到已发送文件夹 |
选中此项可将端口处理的文件复制到该端口的“已发送”文件夹中。 |
| 已发送文件夹方案 |
端口根据选定的时间间隔对 已发送 文件夹中的文件进行分组。例如,Weekly 选项指示端口每周创建一个新的子文件夹,并将本周发送的所有文件存储在该文件夹中。空白设置告诉端口将所有文件直接保存在 已发送 文件夹中。对于处理许多事务的端口,使用子文件夹可以帮助保持文件有序并提高性能。 |
;
export const MiscConnector = () => <>
特殊设置适用于特定用例。
| 设置 |
描述 |
| 其他设置 |
允许在以分号分隔的列表中配置隐藏的端口设置,例如 setting1=value1;setting2=value2。正常的端口用例和功能不需要使用这些设置。 |
;
export const Performance = () => <>
与端口资源分配相关的设置。
| 设置 |
描述 |
| 最大工作线程数 |
此端口上处理文件时从线程池中消耗的最大工作线程数。如果设置,则会覆盖 高级设置 页面的 性能设置 部分的默认设置。 |
| 最大文件数 |
分配给端口的每个线程发送的最大文件数。如果设置,则会覆盖 高级设置 页面的 性能设置 部分的默认设置。 |
;
export const siteNameShort = "知行之桥";
export const siteName = "知行之桥";
Email Send 端口通过 SMTP 邮件服务器发送邮件。
## 核心功能
* 基于 SMTP 的邮件投递,支持现代服务商的 OAuth 2.0 认证
* 支持模板模式,可根据 XML 数据或 {siteNameShort}Script 生成动态内容
* 支持附件模式,可在发送文件的同时自定义邮件正文
* 支持多个收件人(To、CC 和 BCC)及动态字段填充
## 概览
Email Send 端口连接到 SMTP 服务器,将文件作为传出电子邮件消息发送。端口处理的输入文件可以作为电子邮件附件直接发送,也可以从输入文件中解析数据,并通过脚本模板包含在传出消息中。有关创建脚本模板的更多信息,请参阅[模板模式](#模板模式)部分。
Outlook 和 Gmail 邮件服务器的 OAuth 2.0 配置是 Email Send 端口中最常见的两种连接配置。
## 端口配置
本节包含所有可配置的端口属性。
### 设置
#### 邮件发送配置
*与端口名称和描述相关的设置。*
#### 连接
*与连接到 SMTP 服务器相关的设置。*
| 设置 | 描述 |
| ---------------------------- | -------------------------------------------------------------------------------------------------------------------------------------------------------------------------- |
| **Host** | SMTP 服务器的主机名或 IP 地址。 |
| **Port** | 连接到 SMTP 服务器的端口。 |
| **User** | 登录 SMTP 服务器的用户名。 |
| **Authentication Mechanism** | 用于登录服务器的身份验证类型。可用选项会根据你的选择而变化。 |
| **Password** | (Basic 和 NTLM)SMTP 服务器的密码。 |
| **Auth URL** | (OAuth 2.0)服务的授权 URL。点击 **Connect** 按钮登录并授予应用程序权限时,会定向到此 URL。 |
| **Access Token URL** | (OAuth 2.0)访问令牌的 URL。 |
| **Client Id** | (OAuth 2.0)注册 OAuth 时分配的客户端 Id。 |
| **Client Secret** | (OAuth 2.0)注册 OAuth 时分配的密钥。 |
| **Scope** | (OAuth 2.0)应用程序应有权访问的作用域列表。 |
| **Callback URL** | (OAuth 2.0)所连接服务返回令牌以提供访问权限的 URL。服务通常要求你将允许的 URL 加入白名单,因此在服务中配置应用程序注册时应使用此值。 |
| **None** | 不需要身份验证。 |
| **TLS Type** | 连接到服务器时用于协商 SSL/TLS 的方法:**STARTTLS**:先建立明文连接,然后可以通过显式命令启动 SSL/TLS。**SSL/TLS**:无需先建立明文连接,立即进行协商。**None (Plain Text)**:建立明文连接,不使用 SSL/TLS。**Automatic**:端口根据配置的端口号确定 TLS 类型。 |
#### 消息
*与传出电子邮件消息相关的设置。大多数字段可以包含来自传出文件的动态数据(有关更多信息,请参阅[动态字段](#动态字段))。*
| 设置 | 描述 |
| -------------------- | ------------------------------------------------------------------------------------------------------------------------------------- |
| **To** | 传出电子邮件消息收件人的电子邮件地址。使用逗号分隔的列表发送给多个收件人。 |
| **Show From** | 展开一个字段,用于输入传出电子邮件消息发件人的电子邮件地址。端口会尝试根据传递给 SMTP 服务器的 **User** 凭据自动确定此字段的值。 |
| **Add Cc / Add Bcc** | 展开字段,用于输入要抄送(CC)或密件抄送(BCC)的电子邮件地址。使用逗号分隔的列表发送给多个收件人。 |
| **Subject** | 传出电子邮件消息的主题行。 |
| **Message Type** | 指定处理消息的方法:**Attachment**:将到达端口的文件作为附件发送。有关更多信息和示例,请参阅[附件模式](#附件模式)。**Template**:将消息正文解释为从输入文件读取值的脚本模板。有关创建脚本模板的更多信息,请参阅[模板模式](#模板模式)。 |
### 自动化
#### 自动化设置
| 设置 | 描述 |
| ------------------ | -------------------------------------------------------------------------------- |
| **发送** | 指示端口在文件准备就绪时自动发送文件的开关。 |
| **Retry Interval** | 端口在重试失败发送之前等待的间隔。 |
| **Max Attempts** | 端口尝试发送消息的次数。将此值设置为 *1* 会指示端口仅进行初始发送尝试而不重试。每次尝试之间,端口会等待 **Retry Interval** 指定的时长。 |
#### 性能
### 警报
### SLA
### 高级页面
#### 代理配置
#### 高级设置
*与处理相关的额外设置。*
| 设置 | 描述 |
| -------------------------------------------------- | ------------------------------------------------------------------------------------------------------------------------------------------------------------ |
| **Allow {siteNameShort}Script in Attachment mode** | 当 **Message Type** 为 Attachment 时,勾选此项以允许在消息正文中计算 {siteNameShort}Script。 |
| **Excluded Extensions** | 不应由端口处理的文件扩展名列表,以逗号分隔。 |
| **Outgoing Server Public Certificate** | 用于验证 TLS/SSL 服务器身份的公钥证书。如果目标服务器使用 TLS/SSL,请将此字段设置为标识服务器的证书。如果服务器证书不可用,可以将此设置留空以允许底层 OS/JVM 执行证书验证,或将其设置为 `Any Certificate` 以隐式信任服务器身份。 |
| **Extension Map** | 逗号分隔的名称-值对列表,用于确定附件的 Content-Type 消息头值。例如,*.txt=text/plain、.dat=application/edi-x12、.edi=application/edifact*。**注意**:在输入消息中包含 Content-Type 消息头会覆盖此设置确定的内容类型。 |
| **处理延迟** | 放置在 **交易** 选项卡中的文件在处理前延迟的时间(以秒为单位)。这是旧版设置。最佳做法是[使用 File 端口](../flows/designing-a-flow#interacting-with-the-local-file-system)来管理本地文件系统,而不是使用此设置。 |
#### 消息
#### 日志
*与日志创建和存储相关的设置。*
| 设置 | 描述 |
| ------------------------ | --------------------------------------------------------------------------------------------------------------------------------------------------- |
| **Log Level** | 端口生成日志的详细程度。请求支持时,请将其设置为 **Debug**。 |
| **Log Subfolder Scheme** | 指示端口按所选时间间隔对 Logs 文件夹中的文件进行分组。**Weekly** 选项(默认值)会指示端口每周创建一个新子文件夹,并将当周所有日志存储在该文件夹中。将此设置留空表示端口将所有日志直接保存到 Logs 文件夹。对于处理大量交易的端口,使用子文件夹有助于保持日志井然有序并提升性能。 |
| **Log Messages** | 勾选此项可使已处理文件的日志条目包含文件本身的副本。如果禁用此选项,可能无法从 **Input** 或 **Output** 选项卡下载文件副本。 |
#### 其他设置
## 建立连接
建立与 SMTP 服务器的网络级连接需要以下设置:
* Host
* Port
* TLS Type
点击 **Test Connection** 按钮验证端口是否可以连接到服务器。
建立网络级连接后,需要以下设置才能登录服务器并开始发送电子邮件:
* User
* Password
## 发送邮件
端口 **系统设置** 页面上的[消息](#消息)部分决定要发送的电子邮件消息:
* 如果 **Message Type** 设置为 **Attachment**,端口处理的文件将作为电子邮件附件发送,并且应在消息文本编辑器中指定消息正文。有关更多信息,请参阅[附件模式](#附件模式)。
* 如果 **Message Type** 设置为 **Template**,消息文本编辑器将被视为 {siteNameShort}Script 模板。在脚本模板中,可以从端口处理的文件中解析值,并将其包含在电子邮件正文中。有关更多信息,请参阅[模板模式](#模板模式)。
要在一封电子邮件中发送多个附件,需要构建一个包含所有要包含附件的批处理组,然后将该批处理组发送到 Email Send 端口进行处理。
### 动态字段
**To**、**From**、**CC**、**BCC** 和 **Subject** 字段支持来自传出文件的动态信息(例如文件名和已处理该文件的端口)。
文件信息可通过 \[*\_message*] 项获得。*\_message* 项具有一组带有 `header:` 前缀的属性,对应于传出文件中可用的每个消息头。这些消息头包括文件名、与在 {siteNameShort} 流程中处理文件相关的任何元数据,以及通过脚本提升到文件的任何自定义消息头。
与任何其他 {siteNameShort}Script 项一样,*\_message* 项和消息头属性在方括号中引用:
`[_message.header:headerName]`
例如,可以将 Subject 设置为以下值,以包含传出文件的文件名:
`[_message.header:filename]`
### 模板模式
将 **Message Type** 设置为 Template 会指示端口将消息正文解释为 {siteNameShort}Script 模板。模板使用简单的语法与输入文件交互,并检索要在电子邮件正文中使用的值。这些值可以与静态文本组合,生成根据端口处理的文件动态填充的标准正文格式。
要使用 Template 模式,端口必须接收 XML 文件作为输入。模板只能解析 XML 文件中的信息。
#### 基本模板
有关模板消息的示例,请考虑以下输入 XML 文档:
```xml theme={null}
ABC, Inc.
john@abcinc.com
John
Blue Widget
```
此文件在 `Lead` 标签内包含一组属性:`Company`、`Email`、`FirstName`、`Description`。将 `Email` 字段传入消息的 {siteNameShort}Script 表达式如下所示:
`[document.lead_email]`
此表达式包含三个组件:
* *document* 项,指向当前打开的文件。
* *lead\_email* 属性,指向 `john@abcinc.com`。
* 方括号(`[]`),表示使用格式化器而不是文字字符。
上述 XML 输入文件的电子邮件正文模板可能如下所示:
```
Hi [document.lead_firstname],
We saw that you might be interested in the following product:
[document.lead_description]
Would you like to set up a demo to learn more about how we can help you with your work at [document.lead_company]?
```
此消息将生成以下电子邮件:
```
Hi John,
We saw that you might be interested in the following product:
Blue Widget
Would you like to set up a demo to learn more about how we can help you with your work at ABC, Inc.?
```
#### XPath 格式化
XPath 格式化器(在表达式中写为 `xpath`)提供了从文件中检索动态值的替代方法。对于已经在 {siteNameShort} 其他位置使用 {siteNameShort}Script 的用户来说,这种方法可能更熟悉。XPath 要求输入文件是 XML 文件。
使用与上面相同的输入文件示例:
```xml theme={null}
ABC, Inc.
john@abcinc.com
John
Blue Widget
```
返回电子邮件地址的 XPath 表达式如下:
`[xpath(/Lead/Email)]`
此表达式包含三个组件:
* *xpath* 后跟括号,表示该表达式为 XPath 表达式。
* 数据路径,每个级别用斜杠分隔。
* 方括号(`[]`),表示使用格式化器而不是文字字符。
##### 在模板模式下使用 XPath 格式化器
考虑以下 XML:
```xml theme={null}
myProject
Bob Ross
02/27/2024
http://mydomain.com/desc
http://mydomain.com/images
http://mydomain.com/colors
```
对上面的 XML 输入文件使用 xpath 表达式的电子邮件正文模板可能如下所示:
```xml theme={null}
Hi [xpath(/Items/assignee)],
You have a new project to start working on. The name of the project is [xpath(/Items/projectName)].
All the resources you need can be found at the following links:
- Description: [xpath(/Items/resources/description)]
- Images: [xpath(/Items/resources/images)]
- Colors: [xpath(/Items/resources/colors)]
The due date for this project is [xpath(/Items/dueDate)].
```
此消息将生成以下电子邮件:
```
Hi Bob Ross,
You have a new project to start working on. The name of the project is myProject.
All the resources you need can be found at the following links:
- Description: http://mydomain.com/desc
- Images: http://mydomain.com/images
- Colors: http://mydomain.com/colors
The due date for this project is 02/27/2024.
```
#### 代码视图编辑器
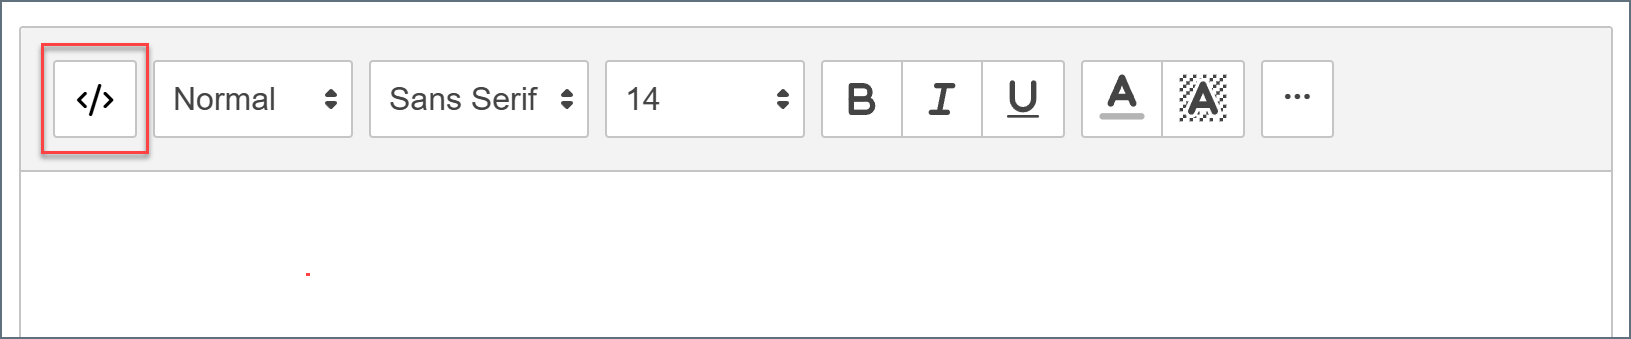
代码视图编辑器支持创建自定义 {siteNameShort}Script,以对来自 XML 文件的信息进行高级处理。要打开代码视图编辑器,请点击消息编辑器中的 **Code View** 按钮。
 在此模式下,{siteNameShort}Script 表达式可用于一次处理多个数据条目。以下输入文件示例包含名称列表:
```xml theme={null}
Dave
在此模式下,{siteNameShort}Script 表达式可用于一次处理多个数据条目。以下输入文件示例包含名称列表:
```xml theme={null}
Dave
-
James
Satchel
-
John
Smith
-
Gina
Newberry
```
在代码视图编辑器中编写的以下消息使用 {siteNameShort}Script 合并了来自该输入文件的数据:
```xml theme={null}
Hi [document.record_to],
Here are the people you were asking about:
[_value]
[_value]
```
此代码会循环输入 XML 文件中的所有名字和姓氏值,并将它们打印在消息正文中。使用上面的输入文件运行时,最终电子邮件如下所示:
```
Hi Dave,
Here are the people you were asking about:
James Satchel
John Smith
Gina Newberry
```
### 附件模式
如果将 **Message Type** 设置为 Attachment,请在编辑器中输入电子邮件正文。如有必要,可以引用输入消息上的消息头来丰富电子邮件正文。然后,Email Send 端口会计算这些消息头,并将输入文件附加到传出电子邮件。
This relies on a previous step in the flow to promote the necessary values as headers onto the message. Depending on the content of the file, you can do this with various Operations and connector settings.
考虑以下 XML:
```xml theme={null}
myProject
Bob Ross
02/27/2024
http://mydomain.com/desc
http://mydomain.com/images
http://mydomain.com/colors
```
电子邮件正文可能如下所示:
```xml theme={null}
Hi [_message.header:assignee],
You have a new project to start working on. The name of the project is [_message.header:projectname].
All the resources you need can be found at the following links:
- Description: [_message.header:description]
- Images: [_message.header:images]
- Colors: [_message.header:colors]
The due date for this project is [_message.header:duedate].
```
此消息将生成以下电子邮件,并包含输入文件作为附件:
```
Hi Bob Ross,
You have a new project to start working on. The name of the project is myProject.
All the resources you need can be found at the following links:
- Description: http://mydomain.com/desc
- Images: http://mydomain.com/images
- Colors: http://mydomain.com/colors
The due date for this project is 02/27/2024.
```